
Many brands create Progressive Web Apps (PWA) for their websites, to enable users to install the super lite web app on their smartphones and enjoy a native app-like experience while browsing that site.
Progressive Web Apps are also great for branding, as once a user installs it, it stays on their Home screen and the brand’s logo stays in the user’s mind.
There’s a rumour on the internet that Progressive Web Apps cannot be made for Blogger. But today I am going to prove that wrong.
In this article, I am going to show you how to create a Progressive Web App for Blogger to let your readers enjoy a native app-like experience on your blog/website.
What are Progressive Web Apps?
Ever noticed a “Add to home screen” pop up in Google Chrome when you visit some websites? Well, that pop up is shown when a website supports PWA.
When you click on the “Add to home screen” button, the website’s logo is added to your phone’s home screen.
To learn more about PWAs, check out this article.
Demo

If you are reading this article on your mobile phone, simply tap on “Add to Home screen” from the menu (chrome menu) and then tap on “Add“. Then you will see that TechRBun’s PWA has been added to your phone’s home screen and when you open it, you will be able to use TechRBun.com just like any other app on your phone.
Well, now that you have got a clear idea about what a PWA is, let’s get started with learning how to make a Progressive Web App for a Blogger site.
Steps To Make Progressive Web App For Blogger
Please note, as of now, it isn’t possible to define the serviceworker.js file for the PWA for Blogger. This is because Blogger doesn’t let the user upload his/her own files to the root directory of the website. And due to this limitation, caching won’t be supported in this PWA.
Also, Google Chrome won’t show the add to home screen pop up. The visitor will need to manually click on the add to home screen button. However, you can obviously include a banner on your site, instructing the user how to install your site’s PWA on their phone.
STEP 1: Get The Correct Favicons
This is the most important step that you need to perform to make a PWA for your blogger blog.
Go to https://favicon.io (this is the best site I have found till now for this purpose)
If you already have a nice logo for your website, choose the “Generate from Image” option or else you can choose the “Generate from Text” option.
Quick Tip: If you are using the “Generate from text” option and want the background of your logo to be transparent, change the background colour value to #FFFFFF00
Download the zip file on your computer and extract the files into a folder.
STEP 2: Compress The Images(Optional Step)
You can optimize those images to reduce their size for faster loading time, using tinypng.com
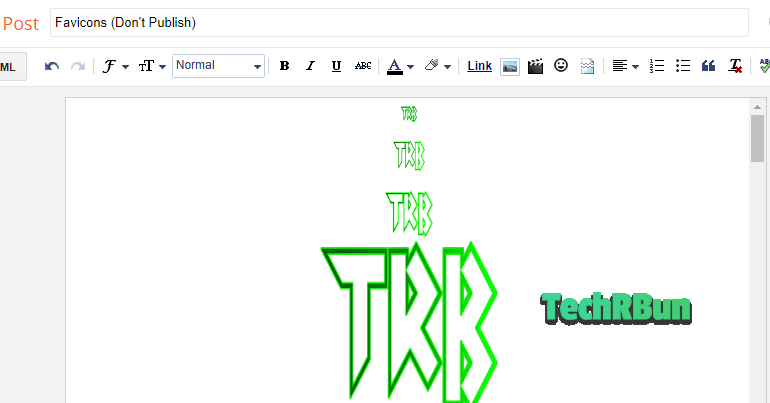
STEP 3: Upload The Pictures To A Draft
Go to blogger.com and create a draft post and upload the extracted pictures to this post in the original size.
And save the post (make sure you don’t publish it)
STEP 4: Edit The site.webmanifest File
Right-click on the site.webmanifest file and click on Edit.
You’ll find two instances of “src”: In the first instance, replace /android-chrome-192×192.png with the link of the 192 x 192 size picture that you uploaded to the draft post.
To find the link, simply right click the picture and click on copy link.
In the second instance, replace /android-chrome-512×512.png with the link of the 512 x 512 size picture that you uploaded to the draft post.
Save the file.
STEP 5: Upload The site.webmanifest To An Online Storage
This article has been updated here. DriveHQ is no more supported, thus it has been replaced with GitHub.
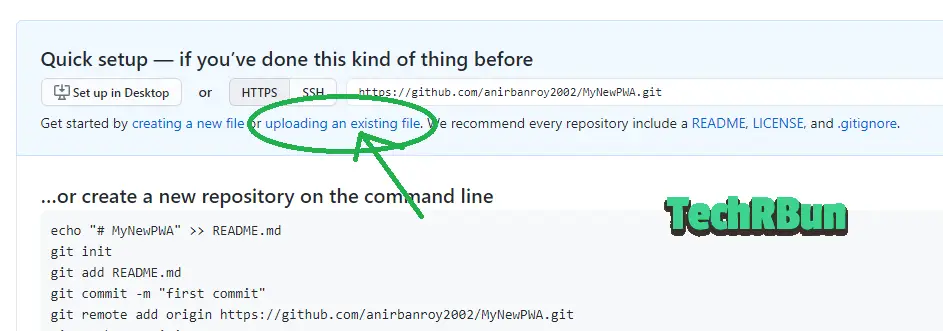
Go to GitHub and sign up.
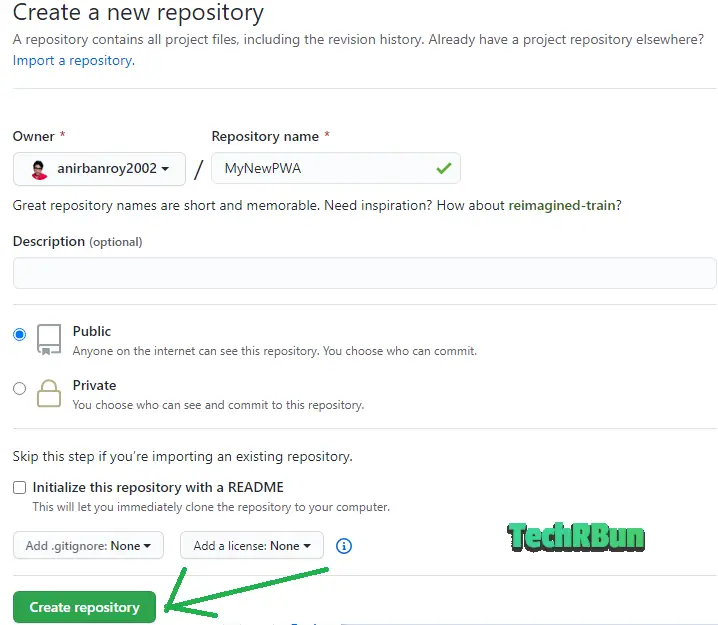
Now create a new Repository.

Give your Repository any name you want and set it to public. Then click on Create repository.
Upload the site.webmanifest file using the “uploading an existing file” link.
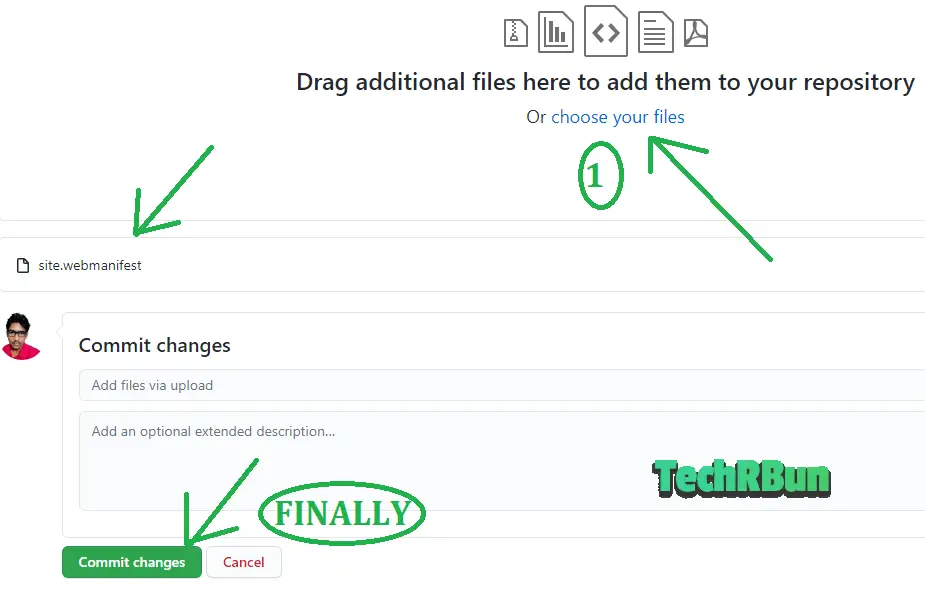
Now click on “choose your files” browse the site.webmanifest file and upload it. Then click on “Commit changes”.
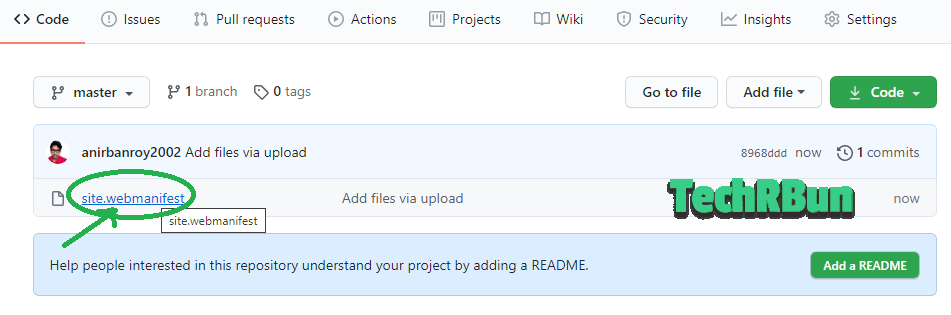
Now click on the site.webmanifest file from your repository.
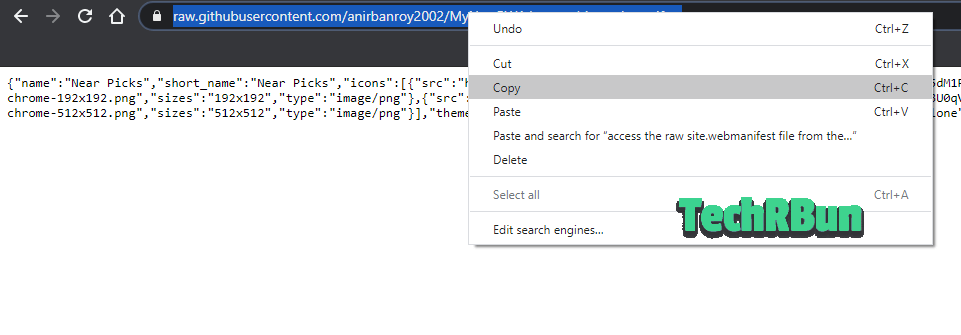
Then, open the raw site.webmanifest file by clicking on Raw.
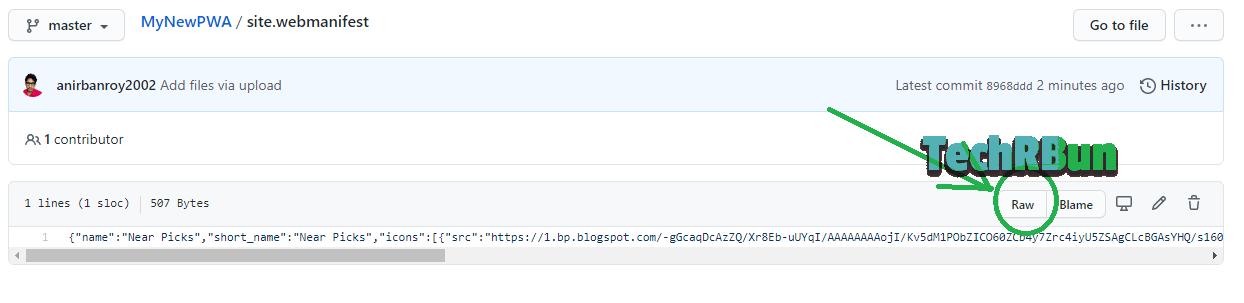
Now copy the URL of the Raw site.webmanifest file for you PWA.
Copy the link and paste it to Notepad so that you can use it later.
STEP 6: Put The Links In The Header
Go to Blogger —> Theme —> Edit HTML.
You’ll see the <head> tag.
Just below this tag, Paste the following lines:
Don’t forget to replace the sample “href=” URLS with the actual URLs.
<link rel="apple-touch-icon" sizes="180x180" href="(REPLACE THIS WITH ORIGINAL) Link to the 180 x 180 size picture"/>
<link rel="icon" type="image/png" sizes="32x32" href="(REPLACE THIS WITH ORIGINAL) Link to the 32 x 32 size picture"/>
<link rel="icon" type="image/png" sizes="16x16" href="(REPLACE THIS WITH ORIGINAL) Link to the 16 x 16 size picture"/>
<link rel="manifest" href="(REPLACE THIS WITH ORIGINAL) Link to the site.webmanifest"/>
Click on the Save theme button.
Done! Congratulations!
You’ve successfully made a Progressive Web App (PWA) for your Blogger blog.
0 Comments: