Mobile app development is the act or process by which a mobile app is developed for mobile devices, such as personal digital assistants, enterprise digital assistants or mobile phones.
Suitable For
People who like to develop mobile apps.
Skills Required
Today many online app maker tools are available which allows you to create mobile apps even if you don't have any knowledge of Android or iOS programming.
To find online app maker tools, Google search 'andoid app maker' or 'ios app maker' .
But if you have the knowledge of Android or iOS app programming it will be an advantage, but not necessary.
You must understand how mobile app stores work and how to market your app on them.
How to Get Started
1. Just learn how to code everything.
2. Pick an Idea.
3.Define the Core Functionalities.
4. Sketch Your App.
5. Use app builders and some coding (using BF SDK).
6. Building the App.
Time Required For Starting CPA Marketing
Depends on the expertise of the app developer and scope of the app.
Tips
1. Find out users’ likes & dislikes.
Right platforms and features.
3. Offline Friendliness.
Make simple apps just like a smartphone.
Ads & Banners: Keep it limited.
Customized Design.
One App For One Reason.
Choose the right people.
How To Monetize
1. Upload a free app on Android’s Play store and Apple’s App store. Monetize it with AdMob, Google’s mobile advertising network.
2. Upload a paid app, set some initial price for downloading the app.
3. More people will download your app more money you will make.
4. You can also promote affiliate products through your app and earn extra commissions.
Many brands create Progressive Web Apps (PWA) for their websites, to enable users to install the super lite web app on their smartphones and enjoy a native app-like experience while browsing that site.
Progressive Web Apps are also great for branding, as once a user installs it, it stays on their Home screen and the brand’s logo stays in the user’s mind.
There’s a rumour on the internet that Progressive Web Apps cannot be made for Blogger. But today I am going to prove that wrong.
In this article, I am going to show you how to create a Progressive Web App for Blogger to let your readers enjoy a native app-like experience on your blog/website.
What are Progressive Web Apps?
Ever noticed a “Add to home screen” pop up in Google Chrome when you visit some websites? Well, that pop up is shown when a website supports PWA.
When you click on the “Add to home screen” button, the website’s logo is added to your phone’s home screen.
If you are reading this article on your mobile phone, simply tap on “Add to Home screen” from the menu (chrome menu) and then tap on “Add“. Then you will see that TechRBun’s PWA has been added to your phone’s home screen and when you open it, you will be able to use TechRBun.com just like any other app on your phone.
Well, now that you have got a clear idea about what a PWA is, let’s get started with learning how to make a Progressive Web App for a Blogger site.
Steps To Make Progressive Web App For Blogger
Please note, as of now, it isn’t possible to define the serviceworker.js file for the PWA for Blogger. This is because Blogger doesn’t let the user upload his/her own files to the root directory of the website. And due to this limitation, caching won’t be supported in this PWA.
Also, Google Chrome won’t show the add to home screen pop up. The visitor will need to manually click on the add to home screen button. However, you can obviously include a banner on your site, instructing the user how to install your site’s PWA on their phone.
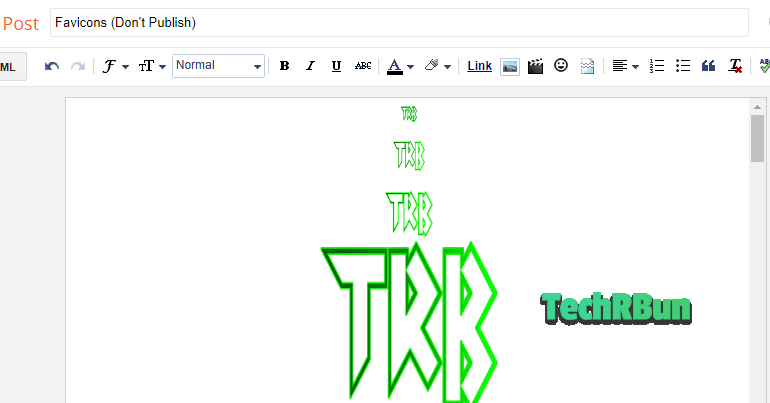
STEP 1: Get The Correct Favicons
This is the most important step that you need to perform to make a PWA for your blogger blog.
Go to https://favicon.io (this is the best site I have found till now for this purpose)
If you already have a nice logo for your website, choose the “Generate from Image” option or else you can choose the “Generate from Text” option.
Quick Tip: If you are using the “Generate from text” option and want the background of your logo to be transparent, change the background colour value to #FFFFFF00
Download the zip file on your computer and extract the files into a folder.
STEP 2: Compress The Images(Optional Step)
You can optimize those images to reduce their size for faster loading time, using tinypng.com
STEP 3: Upload The Pictures To A Draft
Go to blogger.com and create a draft post and upload the extracted pictures to this post in the original size.
And save the post (make sure you don’t publish it)
STEP 4: Edit The site.webmanifest File
Right-click on the site.webmanifest file and click on Edit.
You’ll find two instances of “src”: In the first instance, replace /android-chrome-192×192.png with the link of the 192 x 192 size picture that you uploaded to the draft post.
To find the link, simply right click the picture and click on copy link.
In the second instance, replace /android-chrome-512×512.png with the link of the 512 x 512 size picture that you uploaded to the draft post.
Save the file.
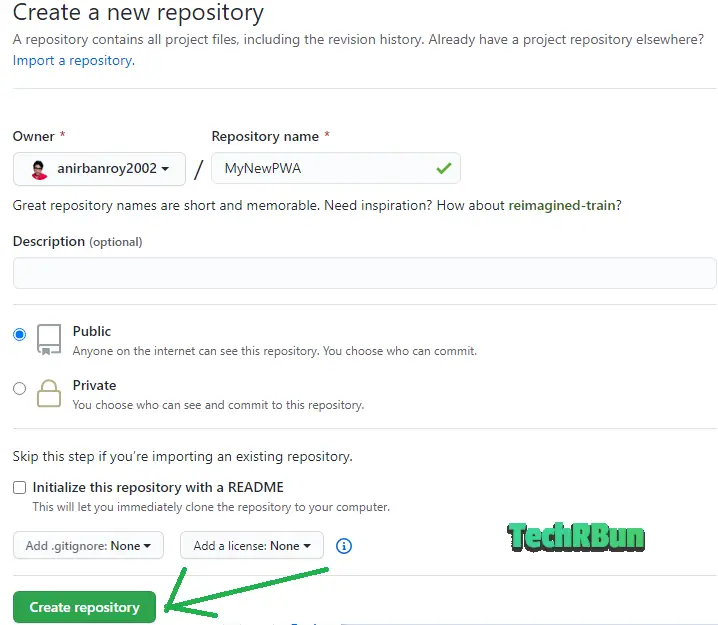
STEP 5: Upload The site.webmanifest To An Online Storage
This article has been updated here. DriveHQ is no more supported, thus it has been replaced with GitHub.
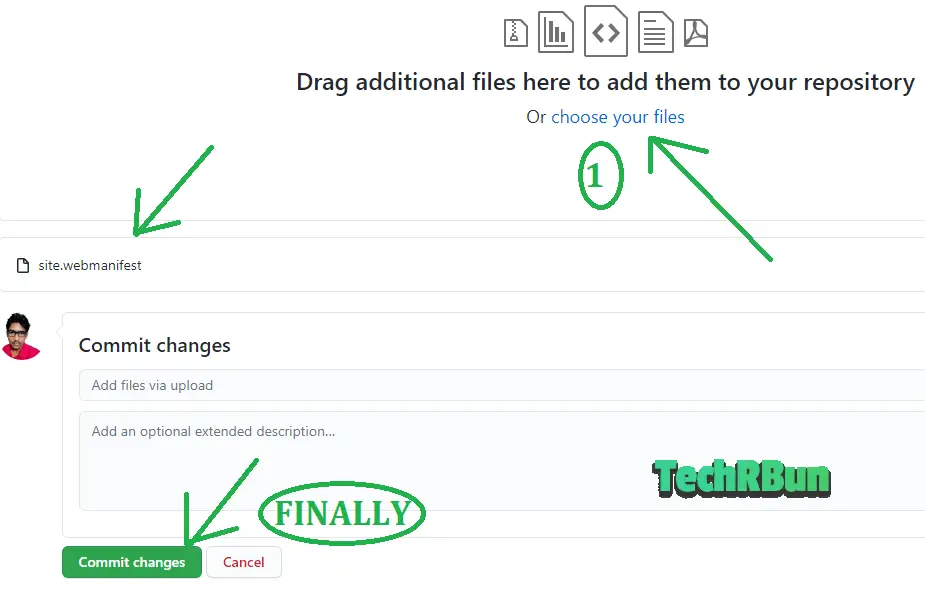
Give your Repository any name you want and set it to public. Then click on Create repository.
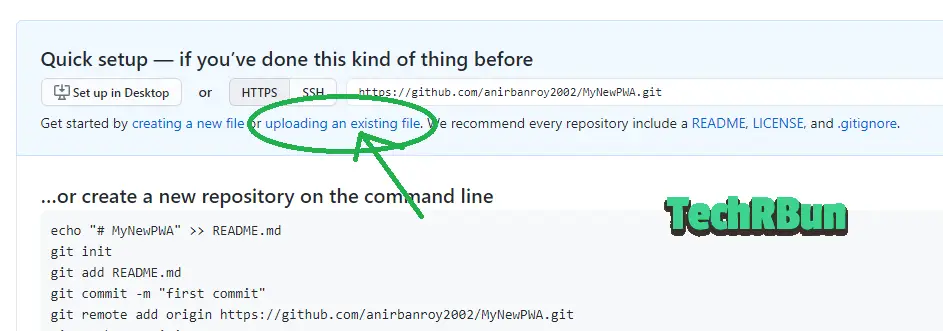
Upload the site.webmanifest file using the “uploading an existing file” link.
Now click on “choose your files” browse the site.webmanifest file and upload it. Then click on “Commit changes”.
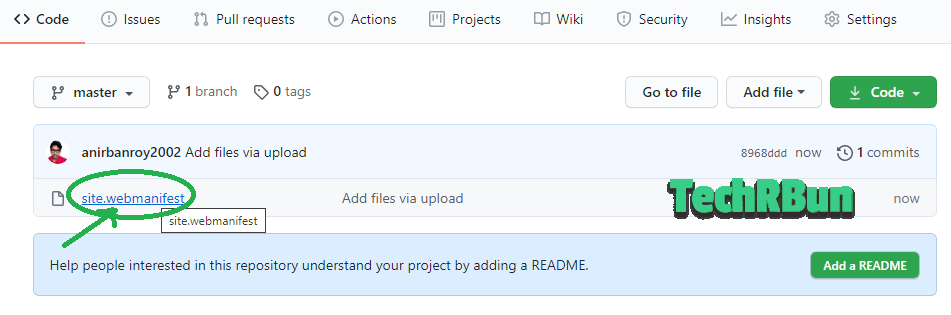
Now click on the site.webmanifest file from your repository.
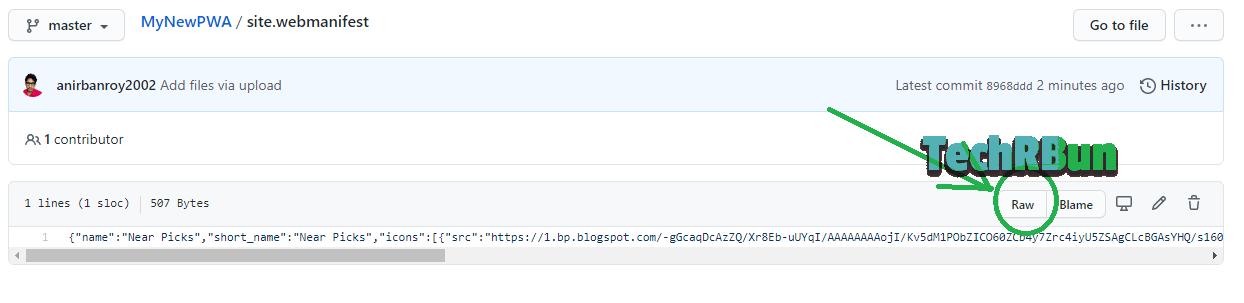
Then, open the raw site.webmanifest file by clicking on Raw.
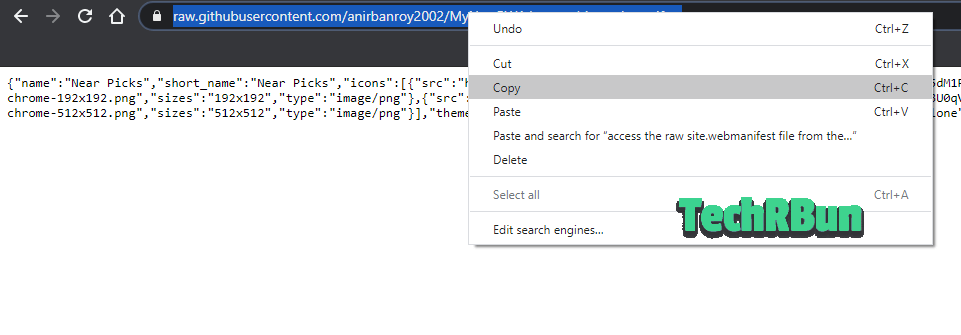
Now copy the URL of the Raw site.webmanifest file for you PWA.
Copy the link and paste it to Notepad so that you can use it later.
STEP 6: Put The Links In The Header
Go to Blogger —> Theme —> Edit HTML.
You’ll see the <head> tag.
Just below this tag, Paste the following lines:
Don’t forget to replace the sample “href=” URLS with the actual URLs.
Copy
<link rel="apple-touch-icon" sizes="180x180" href="(REPLACE THIS WITH ORIGINAL) Link to the 180 x 180 size picture"/>
<link rel="icon" type="image/png" sizes="32x32" href="(REPLACE THIS WITH ORIGINAL) Link to the 32 x 32 size picture"/>
<link rel="icon" type="image/png" sizes="16x16" href="(REPLACE THIS WITH ORIGINAL) Link to the 16 x 16 size picture"/>
<link rel="manifest" href="(REPLACE THIS WITH ORIGINAL) Link to the site.webmanifest"/>
Click on the Save theme button.
Done! Congratulations!
You’ve successfully made a Progressive Web App (PWA) for your Blogger blog.
If you’re someone who wants to become an Android app developer, and certainly if you already are one, you’ll have noticed that there are thousands of apps on the Google Play store. Some are flooded with reviews and have been downloaded thousands of times, others never receive any attention, and have few or no downloads.
In this article, I’ll be covering some of my experiences as an Android developer—I have been programming for a number of years now. I started by learning three programming languages; C, C++, and Java. I then went on to do web development, before advancing to Android development.
The first applications I built were very basic and mainly for fun. A few years ago, I participated in a RHOK (Random Hacks Of Kindness) event and in a team of five we developed the award winning Buddy App. I also developed another app at around the same time, Sema, that would listen to Kiswahili phrases and translate them.
Hopefully, you can learn from my experiences. Let’s get started!
FIRST, UNDERSTAND THE DEVELOPMENT GUIDELINES
Google is the company behind the Android operating system and they have a full set of standards with which you must comply if you want to release Android apps on the Play store.
My first apps were messy. Sometimes I would install them and their icons would appear on top of other icons, or cluttered somewhere by themselves, all because I didn’t follow the user interface navigation guidelines.
These guidelines make it possible for users to quickly understand how your application works, make applications consistent with one another, and will ensure users are more likely to reuse your app. So apply them.
UNDERSTAND YOUR USERS’ NEEDS
Often developers sit in front of a screen, develop, and deploy apps that meet their limited needs. However the most successful apps are built with the user in mind.
In our Buddy app, our users were Android phone owners who often had more than one device. Managing their contacts was an issue, especially when they wanted to transfer contacts, or access their phone remotely. Our aim was to meet their needs.
Once the app is up and running, collect and address any issues raised. If users feel you are handling their issues well, they’ll keep using your app.
Often, developers have strong coding skills, but publish poorly designed interfaces. Remember, the user isn’t interested in the lines of code you have written, they experience the front-end. If you’re not a good interface designer, then collaborate with someone who is. If you can’t find anyone to team up with, learn the fundamentals of design and download some free UI kits.
USE ANDROID, AND STAY UP TO DATE
It is strange to think it, but many Android developers aren’t Android users. Android apps are frequently simply ported from iOS apps, and so don’t take advantage of Android’s enhanced abilities.
By immersing yourself in Android you’ll experience more than just listening to your app users. Participate in Android communities to connect with like-minded people. Forums like those on Google+ have been my learning ground. Many of them are vibrant, and inspirational.
As you know, Android is a Google product. Occasionally Google likes to release updates for its operating system. For example with the release of Android 7.0 Nougat, it is now possible to develop apps that can multi-task.
Multi-tasking allows apps to split the device screen and run multiple applications simultaneously. It’s tremendously helpful, and was announced first at a Google event. By keeping up with these events you’ll discover new techniques that will improve your apps. My favorite is Google I/O, which is a conference I have never missed. It helps me keep my apps updates, and be among the first to implement new standards.
ALWAYS DEVELOP FOR MULTIPLE DEVICES
My first Android device had a 3″ screen, and the apps I developed looked great…until I tried them on a larger screen; then they looked awful.
Android gives users the freedom of choice to run on a variety of devices, with countless different viewport sizes. As a developer you need to ensure that your application is well designed on as many devices as possible—if not all of them,.
However, it is impossible to physically test on every device running Android, and even the wealthiest development companies can only maintain a limited device library. To overcome this I use density-independent pixels in my layouts.
Ensure your application is fast on every device. I will absolutely discard any app that performs slowly, and I am not alone. I also avoid any app that will cost me on space, so make sure you optimize your app. You can enhance the speed of your app by refraining from from using unnecessary objects and variables; the more objects you use the more hiccups occur during garbage collection, which slows the experience even on powerful devices.
TEST YOUR APP. THEN TEST IT AGAIN. AND AGAIN.
As a professional developer you would never dream of releasing an app without testing it, but it is tempting to skip steps.
My friends wanted to see the Sema app on their phones shortly after I had presented it to the group. The app had been running smoothly on my Android simulator, but I hadn’t yet installed it on a real device. When I let me friends install it, the app failed to launch on some devices. There was a bug! Having experienced that embarrassment myself I cannot emphasize enough how important it is to thoroughly test your applications.
Having written the code you’ll already know how it works, so you know what to expect. So I always recommend getting users with a variety of experience levels to test your app, they will find issues that you didn’t expect. Get some other developers to test your app’s performance.


![How To Make Progressive Web App (PWA) For Blogger [EASY]](https://techrbun.com/wp-content/uploads/2019/11/Progressive-Web-App-for-Blogger-Demo2B252812529.png "How To Make Progressive Web App (PWA) For Blogger [EASY]")