Introduction
As per official Firebase documentation −
Firebase can power your app's backend, including data storage, user authentication, static hosting, and more. Focus on creating extraordinary user experiences. We will take care of the rest. Build cross-platform native mobile and web apps with our Android, iOS, and JavaScript SDKs. You can also connect Firebase to your existing backend using our server-side libraries or our REST API.
Firebase Features
-
Real-time Database − Firebase supports JSON data and all users connected to it receive live updates after every change.
-
Authentication − We can use anonymous, password or different social authentications.
-
Hosting − The applications can be deployed over secured connection to Firebase servers.
Firebase Advantages
-
It is simple and user friendly. No need for complicated configuration.
-
The data is real-time, which means that every change will automatically update connected clients.
-
Firebase offers simple control dashboard.
-
There are a number of useful services to choose.
Firebase Limitations
- Firebase free plan is limited to 50 Connections and 100 MB of storage.
In the next chapter, we will discuss the environment setup of Firebase.
Enviroment Setup
In this chapter, we will show you how to add Firebase to the existing application. We will need NodeJS. Check the link from the following table, if you do not have it already.
| Sr.No. | Software & Description |
|---|---|
| 1 |
NodeJS and NPM NodeJS is the platform needed for Firebase development. Checkout our NodeJS Environment Setup. |
Step 1 - Create Firebase Account
You can create a Firebase account here.
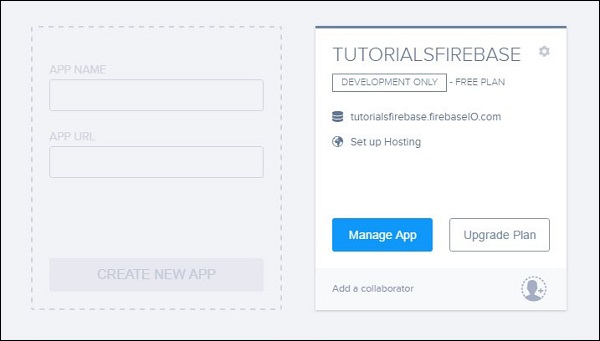
Step 2 - Create Firebase App
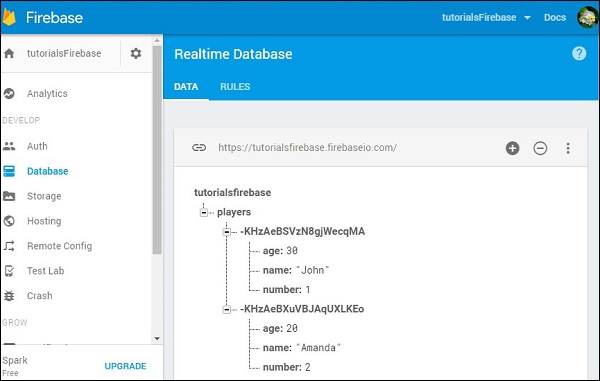
You can create new app from the dashboard page. The following image shows the app we created. We can click the Manage App button to enter the app.
Step 3a - Create basic HTML/js App
You just need to create a folder where your app will be placed. Inside that folder, we will need index.html and index.js files. We will add Firebase to the header of our app.
index.html
<html>
   <head>
      <script src = "https://cdn.firebase.com/js/client/2.4.2/firebase.js"></script>
      <script type = "text/javascript" src = "index.js"></script>
   </head>

   <body>

   </body>
</html>
Step 3b - Use NPM or Bower
If you want to use your existing app, you can use Firebase NPM or Bowers packages. Run one of the following command from your apps root folder.
npm install firebase --save
bower install firebase
Data
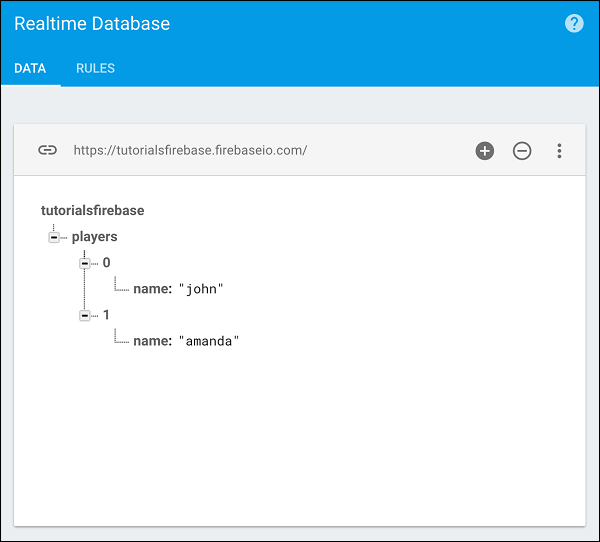
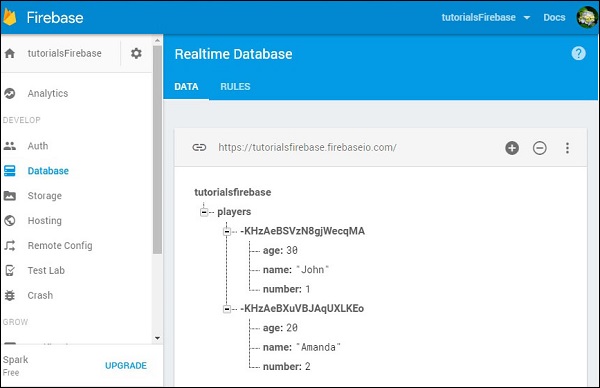
The Firebase data is representing JSON objects. If you open your app from Firebase dashboard, you can add data manually by clicking on the + sign.
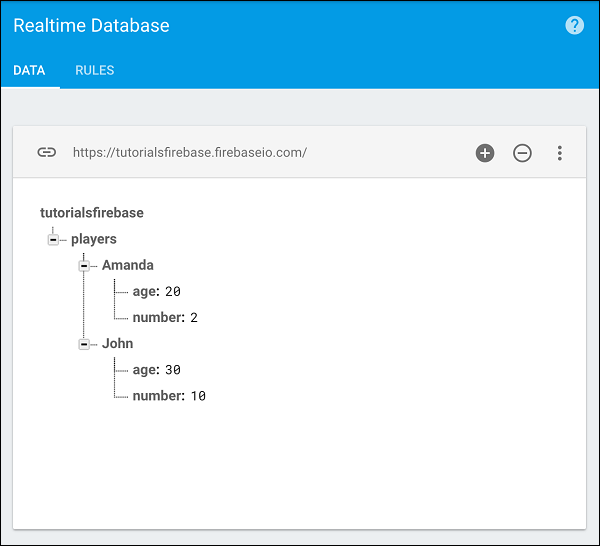
We will create a simple data structure. You can check the image below.
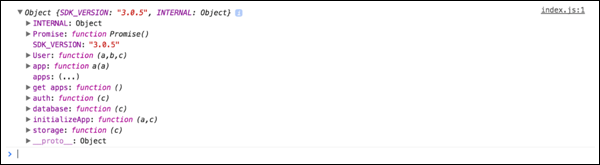
In the previous chapter, we connected Firebase to our app. Now, we can log Firebase to the console.
console.log(firebase)
We can create a reference to our player’s collection.
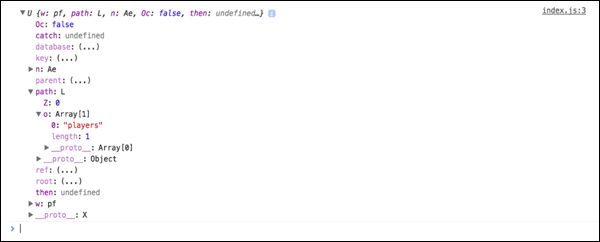
var ref = firebase.database().ref('players');

console.log(ref);
We can see the following result in the console.
Arrays
This chapter will explain the Firebase representation of arrays. We will use the same data from the previous chapter.
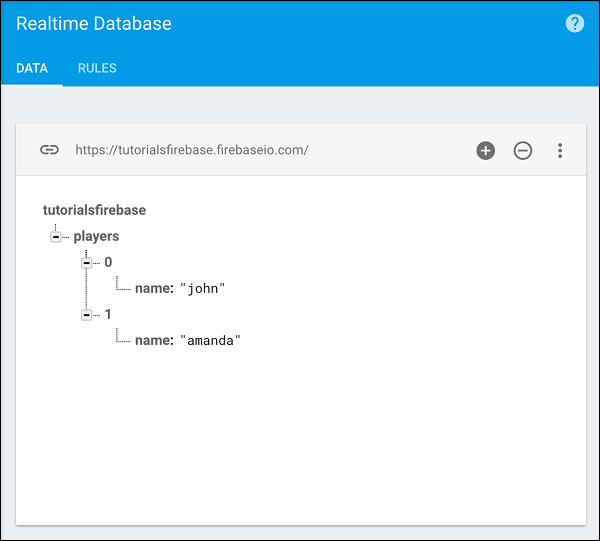
We could create this data by sending the following JSON tree to the player’s collection.
['john', 'amanda']
This is because Firebase does not support Arrays directly, but it creates a list of objects with integers as key names.
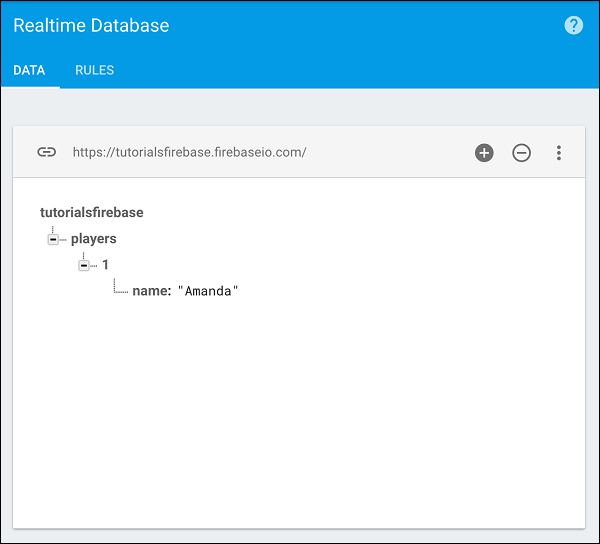
The reason for not using arrays is because Firebase acts as a real time database and if a couple of users were to manipulate arrays at the same time, the result could be problematic since array indexes are constantly changing.
The way Firebase handles it, the keys (indexes) will always stay the same. We could delete john and amanda would still have the key (index) 1.
Write Data
In this chapter, we will show you how to save your data to Firebase.
Set
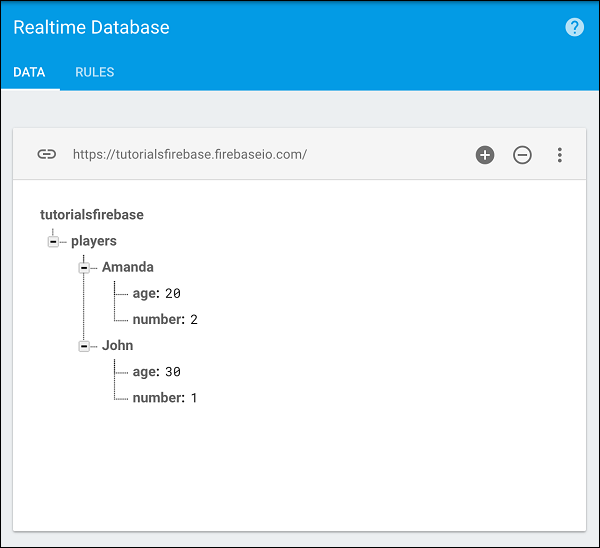
The set method will write or replace data on a specified path. Let us create a reference to the player’s collection and set two players.
var playersRef = firebase.database().ref("players/");

playersRef.set ({
   John: {
      number: 1,
      age: 30
   },

   Amanda: {
      number: 2,
      age: 20
   }
});
We will see the following result.
Update
We can update the Firebase data in a similar fashion. Notice how we are using the players/john path.
var johnRef = firebase.database().ref("players/John");

johnRef.update ({
   "number": 10
});
When we refresh our app, we can see that the Firebase data is updating.
Write List Data
In our last chapter, we showed you how to write data in Firebase. Sometimes you need to have a unique identifier for your data. When you want to create unique identifiers for your data, you need to use the push method instead of the set method.
The Push Method
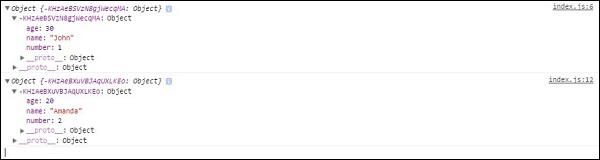
The push() method will create a unique id when the data is pushed. If we want to create our players from the previous chapters with a unique id, we could use the code snippet given below.
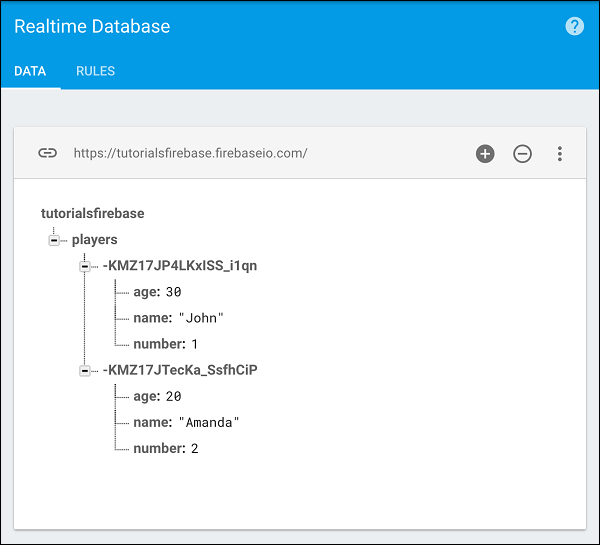
var ref = new Firebase('https://tutorialsfirebase.firebaseio.com');

var playersRef = ref.child("players");
playersRef.push ({
   name: "John",
   number: 1,
   age: 30
});

playersRef.push ({
   name: "Amanda",
   number: 2,
   age: 20
});
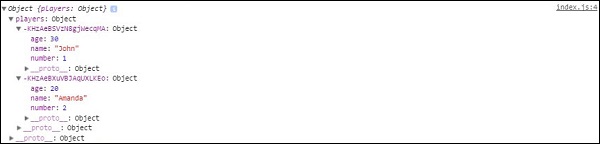
Now our data will look differently. The name will just be a name/value pair like the rest of the properties.
The Key Method
We can get any key from Firebase by using the key() method. For example, if we want to get our collection name, we could use the following snippet.
var ref = new Firebase('https://tutorialsfirebase.firebaseio.com');

var playersRef = ref.child("players");

var playersKey = playersRef.key();
console.log(playersKey);
The console will log our collection name (players).

More on this in our next chapters.
Write Transcational Data
Transcational data is used when you need to return some data from the database then make some calculation with it and store it back.
Let us say we have one player inside our player list.
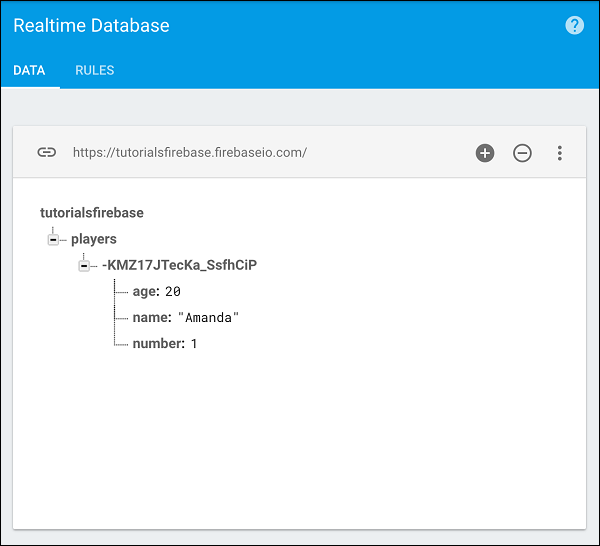
We want to retrieve property, add one year of age and return it back to Firebase.
The amandaRef is retrieving the age from the collection and then we can use the transaction method. We will get the current age, add one year and update the collection.
var ref = new Firebase('https://tutorialsfirebase.firebaseio.com');

var amandaAgeRef = ref.child("players").child("-KGb1Ls-gEErWbAMMnZC").child('age');

amandaAgeRef.transaction(function(currentAge) {
   return currentAge + 1;
});
If we run this code, we can see that the age value is updated to 21.

Read Data
In this chapter, we will show you how to read Firebase data. The following image shows the data we want to read.
We can use the on() method to retrieve data. This method is taking the event type as "value" and then retrieves the snapshot of the data. When we add val() method to the snapshot, we will get the JavaScript representation of the data.
Example
Let us consider the following example.
var ref = firebase.database().ref();

ref.on("value", function(snapshot) {
   console.log(snapshot.val());
}, function (error) {
   console.log("Error: " + error.code);
});
If we run the following code, our console will show the data.
In our next chapter, we will explain other event types that you can use for reading data.
Event Types
Firebase offers several different event types for reading data. Some of the most commonly used ones are described below.
value
The first event type is value. We showed you how to use value in our last chapter. This event type will be triggered every time the data changes and it will retrieve all the data including children.
child_added
This event type will be triggered once for every player and every time a new player is added to our data. It is useful for reading list data because we get access of the added player and previous player from the list.
Example
Let us consider the following example.
var playersRef = firebase.database().ref("players/");

playersRef.on("child_added", function(data, prevChildKey) {
   var newPlayer = data.val();
   console.log("name: " + newPlayer.name);
   console.log("age: " + newPlayer.age);
   console.log("number: " + newPlayer.number);
   console.log("Previous Player: " + prevChildKey);
});
We will get the following result.
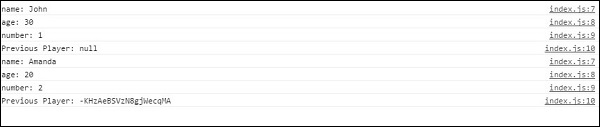
If we add a new player named Bob, we will get the updated data.

child_changed
This event type is triggered when the data has changed.
Example
Let us consider the following example.
var playersRef = firebase.database().ref("players/");

playersRef.on("child_changed", function(data) {
   var player = data.val();
   console.log("The updated player name is " + player.name);
});
We can change Bob to Maria in Firebase to get the update.

child_removed
If we want to get access of deleted data, we can use child_removed event type.
Example
var playersRef = firebase.database().ref("players/");

playersRef.on("child_removed", function(data) {
   var deletedPlayer = data.val();
   console.log(deletedPlayer.name + " has been deleted");
});
Now, we can delete Maria from Firebase to get notifications.

Detaching Callbacks
This chapter will show you how to detach callbacks in Firebase.
Detach Callback for Event Type
Let us say we want to detach a callback for a function with value event type.
Example
var playersRef = firebase.database().ref("players/");

ref.on("value", function(data) {
   console.log(data.val());
}, function (error) {
   console.log("Error: " + error.code);
});
We need to use off() method. This will remove all callbacks with value event type.
playersRef.off("value");
Detach All Callbacks
When we want to detach all callbacks, we can use −
playersRef.off();
Queries
Firebase offers various ways of ordering data. In this chapter, we will show simple query examples. We will use the same data from our previous chapters.
Order by Child
To order data by name, we can use the following code.
Example
Let us consider the following example.
var playersRef = firebase.database().ref("players/");

playersRef.orderByChild("name").on("child_added", function(data) {
   console.log(data.val().name);
});
We will see names in the alphabetic order.

Order by Key
We can order data by key in a similar fashion.
Example
Let us consider the following example.
var playersRef = firebase.database().ref("players/");

playersRef.orderByKey().on("child_added", function(data) {
   console.log(data.key);
});
The output will be as shown below.

Order by Value
We can also order data by value. Let us add the ratings collection in Firebase.
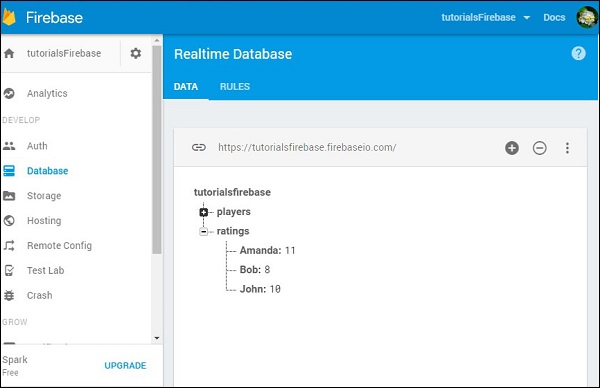
Now we can order data by value for each player.
Example
Let us consider the following example.
var ratingRef = firebase.database().ref("ratings/");

ratingRef.orderByValue().on("value", function(data) {

   data.forEach(function(data) {
      console.log("The " + data.key + " rating is " + data.val());
   });

});
The output will be as shown below.

Filtering
Firebase offers several ways to filter data.
Limit to First and Last
Let us understand what limit to first and last is.
-
limitToFirst method returns the specified number of items beginning from the first one.
-
limitToLast method returns a specified number of items beginning from the last one.
Our example is showing how this works. Since we only have two players in database, we will limit queries to one player.
Example
Let us consider the following example.
var firstPlayerRef = firebase.database().ref("players/").limitToFirst(1);

var lastPlayerRef = firebase.database().ref('players/').limitToLast(1);

firstPlayerRef.on("value", function(data) {
   console.log(data.val());
}, function (error) {
   console.log("Error: " + error.code);
});

lastPlayerRef.on("value", function(data) {
   console.log(data.val());
}, function (error) {
   console.log("Error: " + error.code);
});
Our console will log the first player from the first query, and the last player from the second query.
Other Filters
We can also use other Firebase filtering methods. The startAt(), endAt() and the equalTo() can be combined with ordering methods. In our example, we will combine it with the orderByChild() method.
Example
Let us consider the following example.
var playersRef = firebase.database().ref("players/");

playersRef.orderByChild("name").startAt("Amanda").on("child_added", function(data) {
   console.log("Start at filter: " + data.val().name);
});

playersRef.orderByChild("name").endAt("Amanda").on("child_added", function(data) {
   console.log("End at filter: " + data.val().name);
});

playersRef.orderByChild("name").equalTo("John").on("child_added", function(data) {
   console.log("Equal to filter: " + data.val().name);
});

playersRef.orderByChild("age").startAt(20).on("child_added", function(data) {
   console.log("Age filter: " + data.val().name);
});
The first query will order elements by name and filter from the player with the name Amanda. The console will log both players. The second query will log "Amanda" since we are ending query with this name. The third one will log "John" since we are searching for a player with that name.
The fourth example is showing how we can combine filters with "age" value. Instead of string, we are passing the number inside the startAt() method since age is represented by a number value.

Email Authentication
In this chapter, we will show you how to use Firebase Email/Password authentication.
Create user
To authenticate a user, we can use the createUserWithEmailAndPassword(email, password) method.
Example
Let us consider the following example.
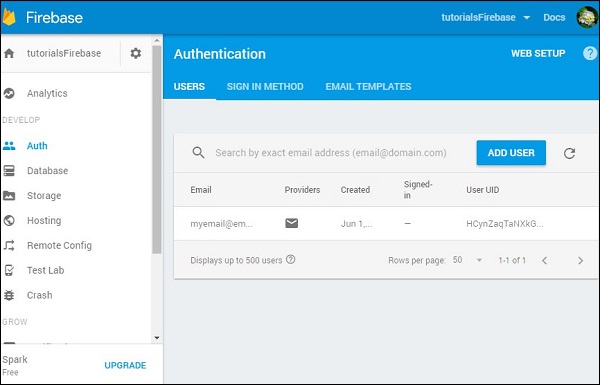
var email = "myemail@email.com";
var password = "mypassword";

firebase.auth().createUserWithEmailAndPassword(email, password).catch(function(error) {
   console.log(error.code);
   console.log(error.message);
});
We can check the Firebase dashboard and see that the user is created.
Sign In
The Sign-in process is almost the same. We are using the signInWithEmailAndPassword(email, password) to sign in the user.
Example
Let us consider the following example.
var email = "myemail@email.com";
var password = "mypassword";

firebase.auth().signInWithEmailAndPassword(email, password).catch(function(error) {
   console.log(error.code);
   console.log(error.message);
});
Signout
And finally we can logout the user with the signOut() method.
Example
Let us consider the following example.
firebase.auth().signOut().then(function() {
   console.log("Logged out!")
}, function(error) {
   console.log(error.code);
   console.log(error.message);
});
Google Authentication
n this chapter, we will show you how to set up Google authentication in Firebase.
Step 1 - Enable Google Authentication
Open Firebase dashboard and click Auth on the left side menu. To open the list of available methods, you need to click on SIGN_IN_METHODS in the tab menu.
Now you can choose Google from the list, enable it and save it.
Step 2 - Create Buttons
Inside our index.html, we will add two buttons.
index.html
<button onclick = "googleSignin()">Google Signin</button>
<button onclick = "googleSignout()">Google Signout</button>
Step 3 - Signin and Signout
In this step, we will create Signin and Signout functions. We will use signInWithPopup()and signOut() methods.
Example
Let us consider the following example.
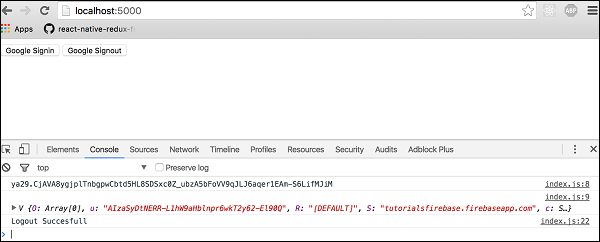
var provider = new firebase.auth.GoogleAuthProvider();

function googleSignin() {
   firebase.auth()

   .signInWithPopup(provider).then(function(result) {
      var token = result.credential.accessToken;
      var user = result.user;

      console.log(token)
      console.log(user)
   }).catch(function(error) {
      var errorCode = error.code;
      var errorMessage = error.message;

      console.log(error.code)
      console.log(error.message)
   });
}

function googleSignout() {
   firebase.auth().signOut()

   .then(function() {
      console.log('Signout Succesfull')
   }, function(error) {
      console.log('Signout Failed')
   });
}
After we refresh the page, we can click on the Google Signin button to trigger the Google popup. If signing in is successful, the developer console will log in our user.
We can also click on the Google Signout button to logout from the app. The console will confirm that the logout was successful.
Facebook Authentication
In this chapter, we will authenticate users with Firebase Facebook authentication.
Step 1 - Enable Facebook Auth
We need to open Firebase dashboard and click Auth in side menu. Next, we need to choose SIGN-IN-METHOD in tab bar. We will enable Facebook auth and leave this open since we need to add App ID and App Secret when we finish step 2.
Step 2 - Create Facebook App
To enable Facebook authentication, we need to create the Facebook app. Click on this link to start. Once the app is created, we need to copy App ID and App Secret to the Firebase page, which we left open in step 1. We also need to copy OAuth Redirect URIfrom this window into the Facebook app. You can find + Add Product inside side menu of the Facebook app dashboard.
Choose Facebook Login and it will appear in the side menu. You will find input field Valid OAuth redirect URIs where you need to copy the OAuth Redirect URI from Firebase.
Step 3 - Connect to Facebook SDK
Copy the following code at the beginning of the body tag in index.html. Be sure to replace the 'APP_ID' to your app id from Facebook dashboard.
Example
Let us consider the following example.
<script>
   window.fbAsyncInit = function() {
      FB.init ({
         appId      : 'APP_ID',
         xfbml      : true,
         version    : 'v2.6'
      });
   };

   (function(d, s, id) {
      var js, fjs = d.getElementsByTagName(s)[0];
      if (d.getElementById(id)) {return;}
      js = d.createElement(s); js.id = id;
      js.src = "//connect.facebook.net/en_US/sdk.js";
      fjs.parentNode.insertBefore(js, fjs);
   } (document, 'script', 'facebook-jssdk'));

</script>
Step 4 - Create Buttons
We set everything in first three steps, now we can create two buttons for login and logout.
index.html
<button onclick = "facebookSignin()">Facebook Signin</button>
<button onclick = "facebookSignout()">Facebook Signout</button>
Step 5 - Create Auth Functions
This is the last step. Open index.js and copy the following code.
index.js
var provider = new firebase.auth.FacebookAuthProvider();

function facebookSignin() {
   firebase.auth().signInWithPopup(provider)

   .then(function(result) {
      var token = result.credential.accessToken;
      var user = result.user;

      console.log(token)
      console.log(user)
   }).catch(function(error) {
      console.log(error.code);
      console.log(error.message);
   });
}

function facebookSignout() {
   firebase.auth().signOut()

   .then(function() {
      console.log('Signout successful!')
   }, function(error) {
      console.log('Signout failed')
   });
}
Offline
In this chapter, we will show you how to handle the Firebase connection state.
Check Connection
We can check for connection value using the following code.
index.js
var connectedRef = firebase.database().ref(".info/connected");

connectedRef.on("value", function(snap) {
   if (snap.val() === true) {
      alert("connected");
   } else {
      alert("not connected");
   }
});
When we run the app, the pop up will inform us about the connection.
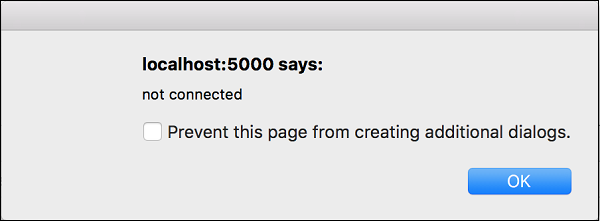
By using the above given function, you can keep a track of the connection state and update your app accordingly.
Security
Security in Firebase is handled by setting the JSON like object inside the security rules. Security rules can be found when we click on Database inside the side menu and then RULES in tab bar.
In this chapter, we will go through a couple of simple examples to show you how to secure the Firebase data.
Read and Write
The following code snippet defined inside the Firebase security rules will allow writing access to /users/'$uid'/ for the authenticated user with the same uid, but everyone could read it.
Example
Let us consider the following example.
{
   "rules": {
      "users": {

         "$uid": {
            ".write": "$uid === auth.uid",
            ".read": true
         }

      }
   }
}
Validate
We can enforce data to string by using the following example.
Example
{
   "rules": {

      "foo": {
         ".validate": "newData.isString()"
      }

   }
}
This chapter only grabbed the surface of Firebase security rules. The important thing is to understand how these rules work, so you can combine it inside the app.
Deploying
In this chapter, we will show you how to host your app on the Firebase server.
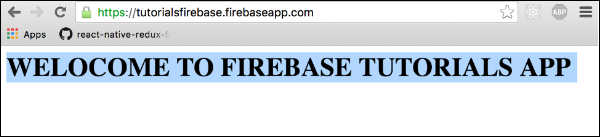
Before we begin, let us just add some text to index.html body tag. In this example, we will add the following text.
<h1>WELCOME TO FIREBASE TUTORIALS APP</h1>
Step 1 - Install Firebase Tools
We need to install firebase tools globally in the command prompt window.
npm install -g firebase-tools
Step 2 - Initialize the Firebase App
First we need to login to Firebase in the command prompt.
firebase login
Open the root folder of your app in the command prompt and run the following command.
firebase init
This command will initialize your app.
NOTE − If you have used a default configuration, the public folder will be created and the index.html inside this folder will be the starting point of your app. You can copy your app file inside the public folder as a workaround.
Step 3 - Deploy Firebase App
This is the last step in this chapter. Run the following command from the command prompt to deploy your app.
firebase deploy
After this step, the console will log your apps Firebase URL. In our case, it is called https://tutorialsfirebase.firebaseapp.com. We can run this link in the browser to see our app.